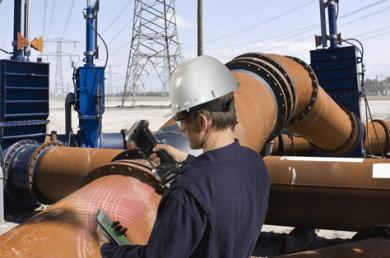
DEKRA Industrial is one of the leaders in the prevention of industrial and occupational hazards in France and Europe. With its expertise to identify and assess hazards, the company plays an instrumental role in risk prevention for a variety of companies.
Material inspection, which mostly take place in the French region of Lyon, encompass a wide range of conventional and non-conventional NDT services and tools, such as conventional and phased array ultrasonic testing, time-of-flight diffraction (TOFD), Eddy current, robotics, electromagnetic acoustic transducer (EMAT), conventional and digital X-ray inspection, 3D laser measurements, alternating current field measurement (ACFM), thermography, Lixi Profiler, guided waves, AcousticEye and surface inspection.
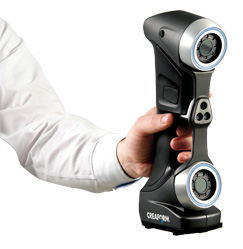
Creaform HandySCAN 700 scanner
Since the fall of 2014, DEKRA Industrial has been using the HandySCAN 3DTM scanner and VXelementsTM data acquisition software with PipecheckTM, the software platform used to assess corrosion and mechanical damage in pipelines, refinery columns, and storage tanks.
"We made the decision to invest in Creaform’s 3D scanner and software as the solutions would allow us to perform all applications and tasks usually required in typical NDT environments with the flexibility that we needed. It is the best tool to effectively control pipelines, skirts or columns—even when access is difficult and no power supply is within reach," explained Nicolas Cricoveanu, Head of Advanced NDT at DEKRA Industrial.
One of DEKRA Industrial’s recent NDT applications was to control the external corrosion of a column skirt in a refinery.
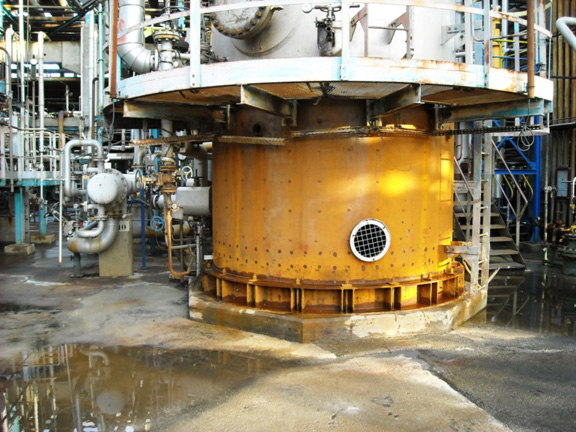
Column skirt after being fireproofed and sanded in preparation for corrosion inspection.
The skirt had a diameter of 3 m and the surface to inspect started at a height of 0.6 meters and ended at 2 m,with a nominal thickness of 10 mm. The skirt interior was covered with a concrete layer that prevented access to the opposite surface. The surface itself was complex and included many support plates, cavitations, manholes, insulation supports (about 50 on the control area), guards and mounting bolts. The objective was to control 100% of the accessible surface.
As the state of deterioration of the external surface was too advanced to proceed with a conventional ultrasonic control or to use a manual pit gauge, the HandySCAN 3D and Pipecheck software allowed operators to scan the surface in 3D to assess the most damage around the skirt’s circumference. Later, the results were presented in an official inspection report generated in Pipecheck.
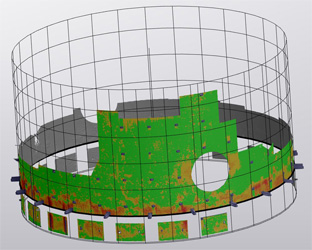
Mapping of the column skirt after scanning. The scans highlight the corrosion (red areas) at the bottom of the skirt.
The above application and methodology are based on the control of a 20 m2 surface carried out by DEKRA Industrial during a single intervention. This will enable the company to reduce data processing times in the future.
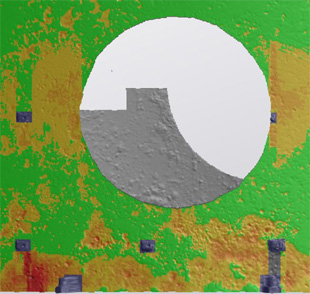
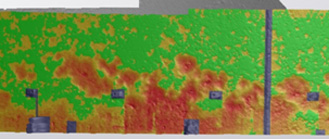
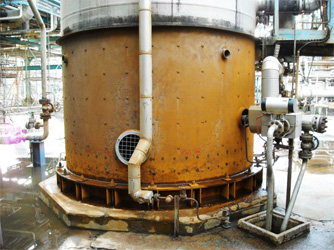
Detailed views of the manhole (left) and of a lower area of the column skirt (right).
The grey zones on the map indicate the insulation supports and presence of a welded joint. Creaform's Pipecheck software also helps to accurately estimate each indicator or group of indicators revealed on the color map by providing the profiles of material losses and their associated depths.

Nicolas Cricoveanu,
Head of Advanced NDT
at DEKRA Industrial
Before making the switch to Creaform's inspection system, DEKRA Industrial used a manual pit gauge and ultrasonic controls to inspect surfaces when their opposite surfaces were accessible and in good condition. However, in this case, the state of the surface would not have allowed for manual control according to the tests carried out before DEKRA Industrial's intervention. The method used with Creaform’ssolution provided relevant results—all while reducing control times. Had DEKRA Industrial used a manual pit gauges, it would have required a minimum of 3 to 4 hours without providing guaranteed results.
Nicolas Cricoveanu is thrilled with Creaform’s results. "The external damage assessment provided reliable high-quality results. We can now perform controls more quickly and accurately than with manual tools. As such, both the service provider and the client benefit from productivity gains since it greatly reduces downtimes due to control operations."