“The Creaform solution is highly accurate, easy to use and well-suited to a production line environment. Having the system ready at hand gives us the flexibility and response time we need to quickly investigate measurement and quality issues as they arise.”
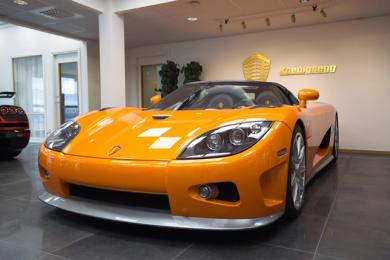
The Swedish company Koenigsegg Automotive AB is the market leader within the elite hypercar market, developing and hand-building advanced artisan vehicles since 1994.
The journey of Koenigsegg, since its inception, is truly incredible. It all started on August 12, 1994 when a young man, aged 22, set out to realize his childhood dream. He was a young man fuelled by passion, ingenuity and mind-bending will. Christian von Koenigsegg had just made up his mind to live his dream and start his own car company. The odds were stacked against him. It was a now or never moment. His idea was to create a sports car that he felt did not currently exist and one which he believed would be desired—two essential necessities for success, Christian felt.
The concept: A lightweight mid-engine car with a detachable, storable hardtop. The car would also feature a wrap-around screen for good visibility and aerodynamics as well as short overhangs with two large intercooler intakes on the side of the car, located behind the mass centre to aid high-speed stability. The car would look and feel good with the top up or as a roadster—transformed in minutes with the hard top neatly tucked away inside the car. Christian envisioned a car with a timeless appearance that aged like good wine. This was a mid-engine car concept that did not exist at the time.
The CC8S was born.
Every Koenigsegg created since then now includes this simple, but effective, DNA attuned to Christian’s original vision.
Five production models with as many Guinness production car records later, Koenigsegg has exploded on to the international scene and is here to stay. When Christian is asked what his greatest achievement is, he says without hesitation: “Living the dream!”
The day Koenigsegg got in touch with Creaform, the company was using rental services for measurement tasks. A four-meter Romer Arm with scan and probe heads or a Leica Tracker together with PolyWorks were employed. The measurement and scanning systems were primarily used for root cause analysis on the production line, comparing physical parts to nominal CAD as well as for fixture set-up, commissioning and reverse engineering tasks in which hand made parts were replaced by and CAD data produced using Catia V5R19 for production tooling and manufacturing.
Frequent functional downsides of the rental equipment, substantial expenses and time constraints as well as the goal to have in-house 3D measurement skills, brought Koenigsegg to start looking for alternatives on the market. Creaform’s Swedish reseller, MLT Maskin & Laserteknik AB, went to Koenigsegg for an on-site demonstration of Creaform’s 3D measurement technologies.
“After benchmarking all available measurement systems, we felt that Creaform products and solutions fitted best with our demanding requirements and environment. Being less sensitive to movements during scanning and probing, the Creaform’s solutions are better-suited to a production line environment,” explained Jon Gunner, Technical Director at Koenigsegg. “We decided to invest in the HandySCAN 3D scanner and portable optical CMM HandyPROBE from Creaform and the CAD and inspection software called PolyWorks.”

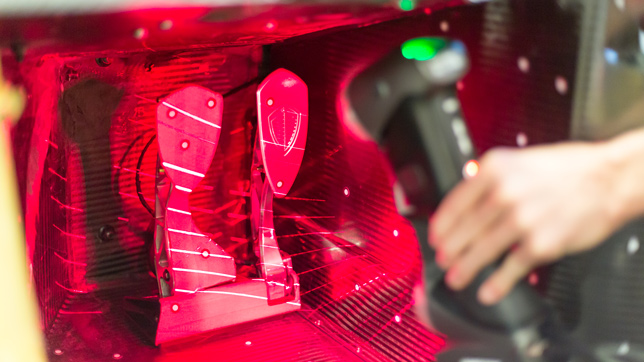
HandySCAN 3D metrology-grade scanners can capture up to 480,000 measurements/s with an accuracy of up to 0.030 mm.
The handheld HandySCAN 3D laser scanners provide breakthrough accuracy and resolution as well as significantly high measurement rates—all in a single, portable device. They can be used in all phases of the product life cycle: from conception, through design, manufacturing up to documentation, maintenance and repair purposes.

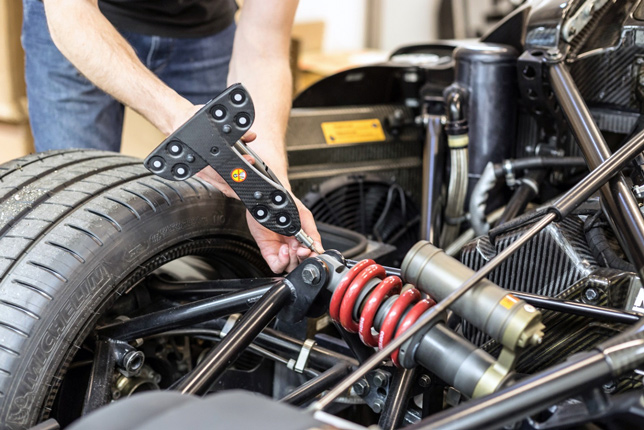
Free of any rigid measurement set up, HandyPROBE offers unmatched flexibility and a wider measurement volume than other portable CMMs.
The HandyPROBE portable CMM arm-free measurement system is the alternative to traditional measurement arms. The HandyPROBE is a wireless, triangulation–based CMM that offers complete freedom of movement and can be used for single or repeated measurements of various parts. The CMM is tracked by C-Track optical tracker. C-Track sensors also ensure the exact position of the HandyPROBE, perform continuous image acquisition and transmission, provide lighting of reflectors, manage exchanges with the computer, and store sensor parameters.
Both systems benefit from the integrated TRUaccuracy technology, which ensures highly accurate measurements when operating under real working conditions—regardless of vibrations, instabilities or thermal differences in the work environment.
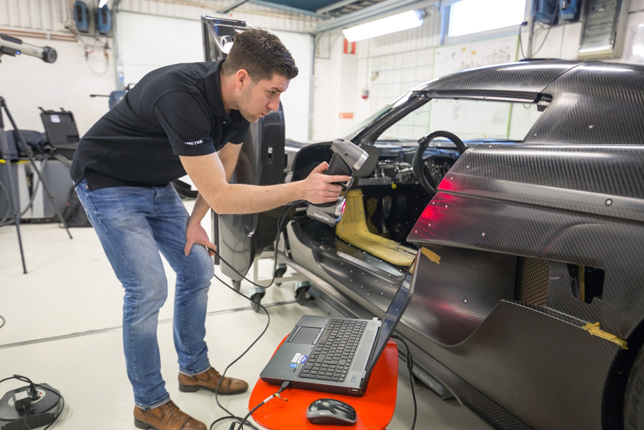
The HandySCAN 3D scanner and the portable CMM HandyPROBE are now primarily used at the Swedish company for automotive quality control, measuring assemblies and components, and validating them to CAD as well as for root cause problem solving, reverse engineering and jig calibration. For jig calibration, Koenigsegg uses, for example, the probing system HandyPROBE to accurately adjust the nominal hard points. Then, users scan with the HandySCAN 3D scanner the parts once they are held by the jig as a validation process against the CAD data. This allows the company to trim the jig if a nominal offset should be required.

For quality control or engineering projects, HandySCAN 3D enables users to reduce turnaround times and increase profitability. Shown above scanning the body of a Koenigsegg Regera.
Jon Gunner is happy with the investment in the Creaform systems: “Already six months after the purchase, I estimated that we were halfway to gaining a return on our investment based on third-party rental fees and improvements to production quality. Creaform’s solutions are highly accurate, easy to use and ideal for a production line environment. Having the system ready at hand gives us the flexibility and response time we need to quickly investigate measurement and quality issues as they arise.”